- Home
- Lean Principles
- Machine Selection
- Mold Design
- Mold Interlocking
- Mold Making
- Plastic Material Technology
- Molding Process
- Plastic News
- What's New
- Privacy Policy
- Disclaimer
- Site Map
- Poll
- Polishing
- 3D Rapid Prototyping
- Molding Companies
- Contact Us
- Proven Thinwall Packaging Mold Designs For Sale
- MOLD WEIGHT CALCULATOR
- HOT RUNNER VERSUS COLD RUNNER
Using Injection Molding Troubleshooting To Improve Production Performance

Fix Your Flash.
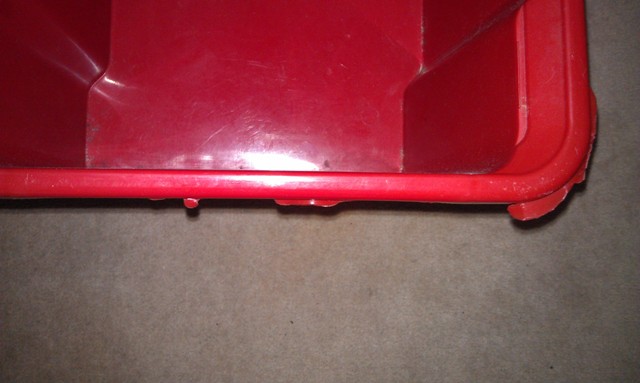
In injection molding troubleshooting, flashing is one of the most common quality issues.
A plastic part is said to have flash when plastic extends beyond its normal shape.
Flashing occurs when plastic material flows across the shut-off surfaces of the injection mold.
Eliminating part flash can have huge cost savings and should be part of a lean manufacturing program.
But how to Fix Flash?
The root causes of flash can be grouped into 5 different areas:
- Poor plastic material selection
- Incorrect processing parameters
- Mould issue
- Moulding machine issue
- Part design issue
Isolating which area is causing the flash can be quite difficult so it must be done in a step by step procedure eliminating each possible cause one at a time.
When doing injection molding troubleshooting, keep an open mind because the cause might be different to what you think it is.
1. Poor Plastic Material Selection
Plastic Material With Low Viscosity
Explanation: A material with low viscosity flows easier into a mould cavity than a material with higher viscosity. Many things effect the viscosity of a material such as barrel temperature but the grade of plastic material used also plays a role. Melt flow index (MFI) is often used as a guide to measure the ease of flow but this does not give the full story. MFI tests are performed under low shear rates but injection moulding uses higher shear rates during the injection fill stage. Some materials behave differently under different shear rates so only use the MFI as a guide.
Action: Change to a lower MFI plastic material. A lower MFI will be less likely to flow across shut-off surfaces as it is more viscous but injection pressure will probably increase.
Keep in mind some additives can also change the MFI so of you are mixing before feeding into the machine then be aware the flow properties might change.
2. Incorrect Processing Parameters
The first thing to do when flash is an issue is to compare the current process parameters with past process parameters that were documented when quality parts were first produced.
When using this injection molding troubleshooting guide below change one parameter at a time by a small amount (say 5%) until you get a result.
Shot Size Too Big
Explanation: Injecting more plastic material than required will overcome the clamp tonnage and open the mould allowing flash formation.
Action: Reduce screw start position. For example from 80mm to 75mm. This will reduce the amount of plastic going into the mould
High Injection Speed
Explanation: A high injection speed reduces the viscosity of the material and allows it to flow easier.
Action: Reduce injection speed by a small amount, say, 5%.
High Hold Pressure
Explanation: High hold pressure can force the mould to open slightly and allow plastic to flow across the shut-off surfaces. To check if this is the cause mount a dial indicator between the fixed and moving platens as close as possible to the mould. If the mould opens during the hold phase then reduce the pressure until the flash disappears. 0.02mm opening is enough to give a slight flash around the part.
Action: Reduce hold pressure.
Incorrect Change Over Position
Explanation: Change Over position tells the machine when to change from injection pressure to hold pressure. If the cavity is already full when the change over position is reached then the hold pressure can force the mold to open and allow plastic to flow across the shut-off surfaces
Action: Increase change over position. For example from 20mm to 25mm.
High Barrel Temperatures
Explanation: High barrel temperatures allow the plastic to flow much easier into the mold by reducing its viscosity.
Action: Reduce barrel temperatures in 10 degree increments. Will need at least 30 minutes to get a result as the barrel will take time to stabilize.
High Back Pressure
Explanation: High back pressure raises the plastic material temperature by adding more shear heat to the material during plasticizing which causes it to flow easier into the mold cavity.
Action: Reduce back pressure slightly. Effect should be immediate.
Low Clamp Tonnage
Explanation: Although this could have been tried first and might have fixed the flashing problem, its not a substitute for excessive injection speed or hold pressure.
Action: Increase clamp tonnage by 5 ton at a time.
3. Mould Issue
When injection molding troubleshooting, the mould is usually the first area to checked. Injection moulds can cause flash through mould deflection, poor mould building quality, inadequate mould design, lack of maintenance and poor die setting procedures.
Uneven Cooling
Explanation: If the temperature through out a mold cavity is not even then the plastic flow will give preference to the warmer areas during the filling phase. In other words, the warmer sides of the mold cavity will fill first creating a pressure imbalance which can open the mold resulting in flash formation.
Action: Cycle the mould a dozen times then immediately measure the cavity surface temperature in 4 different places using a pirometer. The difference should not be more than 5 Degrees Celsius. Do the same for the core.
If there is a difference do everything you can externally to improve the water flow - for example, make sure all of the water hoses into the mould are big enough to get good water flow and are not restricted by small water fittings. Also, do not loop any water circuits; make them all individual if possible.
Also, if a mold has not been maintained properly the water channels probably need cleaning. Calcium build-up is common on the inside of water channels and reduces the cooling ability of the mold. Build up can be removed chemically or physically by hand with a drill or some kind of sharp object. Click here to see an example of this (example #3) and to get help with other mould issues (opens in a new window).
4. Injection Molding Machine
When injection molding troubleshooting the molding machine is usually the last area to be checked. After all, if the machine has been producing good parts for years then why should this suddenly be the cause of flash?
The reason is because the condition of a machine will slowly change over a period of time which affects part quality in a very small way at first. Gradually part quality will get worse.
Shot Size Too Small For Molding Machine.
Explanation: If the shot size is less than 25% of the injection units maximum shot capacity then it will be difficult to maintain a stable process.An injection screw needs a reasonable distance to move to be able to maintain control over speeds and pressures.
Action: Move mold to a machine with a smaller shot size capacity.
Uneven Tie Bar Stretch
Explanation: Uneven tie bar stretch will give uneven clamp pressure on a mould. For example, if we assume a symmetrical part is being molded such as a square lid, the flash will occur on the side of the tie bar providing the least amount of clamp.
Action: Get the machine service agent to check or check yourself by using 4 dial indicators. Attach the magnetic base of each dial indicator to a stand which is sitting on the floor at the end of the machine and put the stylist of the dial indicator on the end of each tie bar.
Set each dial indicator to zero.
Clamp the mould and read the tie bar stretch directly off each dial indicator.
They should be within 0.05mm (0.002 inch) of each other
Note: it is important that the mould, plate or ring that is being clamped has been checked to be flat. If it is not it will give a false tie bar stretch.
Worn Molding Machine Platens
Explanation: Often any particular molding machine is used to produce parts from several different sized moulds. A common mistake moulders make is putting a small mould into a big machine and running it for long periods of time.
What eventually happens is the small mould hobbs into the platen leaving it with an impression. And when the small mould is replaced with a slightly larger mold the parts have flash. Click here to see an example of this (example #1) (opens in a new window).
Action: Do a visual check of both platens without the mould in the machine. A hobbed impression is easy to see and you can also feel the edge of it with your fingers. Make sure the platens have been cleaned first.
Damaged Molding Machine Platens
Explanation: During mould installation platens can be damaged by the corners of a mould causing some impressions. These impressions have high spots around them which will cause the mould to clamp up unevenly. This uneven pressure can cause flash.
Action: Always clean the platens with a suitable stone to remove any high spots before installing the mould.
Injection Unit
Explanation: Sudden flashing problems can mean an issue with the injection unit.
Action: Check consistency of cushion position and screw start position. Make sure they are within normal limits.
5. Part Design Issue
Uneven Wall Thickness
Explanation: Uneven wall thickness is the main reason for flash formation due to part design. Uneven wall thickness puts uneven forces inside the mold cavity potentially forcing one side of the mold to open during the filling and hold phases of the molding process.
Action: Increase clamp tonnage. If this is not possible then make the wall thickness even but this can be very costly and time consuming because both the part design and mould design will need to be modified.
Discounted Mould Design For Sale

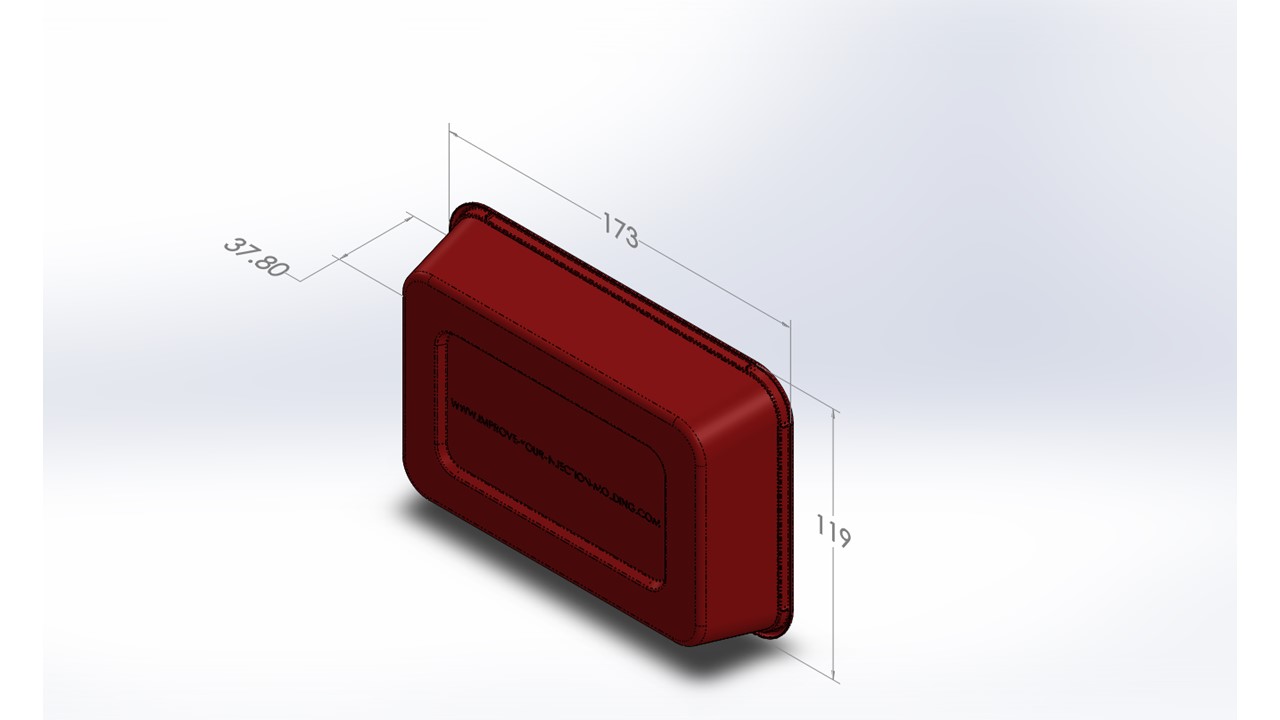
500ml Thinwall Disposable Food Tub 16.5 Grams
Additional Comments
Injection molding troubleshooting can have a huge affect on cost savings and your production performance.
Although it can be costly to get the root causes of part flash repaired the question you have to ask yourself is:
What is the long term cost of not fixing the flash?
Return from Injection Molding Troubleshooting to Plastic Injection Molding Process


