- Home
- Lean Principles
- Machine Selection
- Mold Design
- Mold Interlocking
- Mold Making
- Plastic Material Technology
- Molding Process
- Plastic News
- What's New
- Privacy Policy
- Disclaimer
- Site Map
- Poll
- Polishing
- 3D Rapid Prototyping
- Molding Companies
- Contact Us
- Proven Thinwall Packaging Mold Designs For Sale
- MOLD WEIGHT CALCULATOR
- HOT RUNNER VERSUS COLD RUNNER
Stripper Plate In Injection Molding
What Is a Stripper Plate?
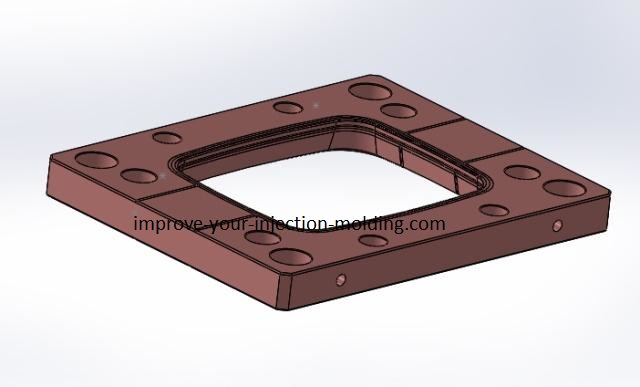
A stripper plate is simply a plate that is used to push a part off an injection mold core. In other words, it removes the part off a core, preparing the mold for the next shot. It makes full contact with the outer edges of a part and this makes it a reliable method of ejection in injection molding.
When To Use.
A stripper plate is used when ejector pins or pressurized air will not be enough to eject a part off a core. Examples of parts using a stripper for ejection are caps, containers and lids.
Stripper plates are very common in thin wall injection molding because by their nature these parts are weak so the ejection method requires full contact with the outer edge of the part to remove it off the core.
Parts with thicker walls (greater than 1mm) can usually be ejected with ejector pins and pressurized air but often this is unreliable, as parts do not eject properly 100% of the time - sometimes they can hang up on the core. Moreover, cycle time is usually longer especially with tall parts even when they do eject well. A stripper plate will eject parts quickly 100% of the time. Stripper plates can be used for both single cavity and multi-cavity injection molds.
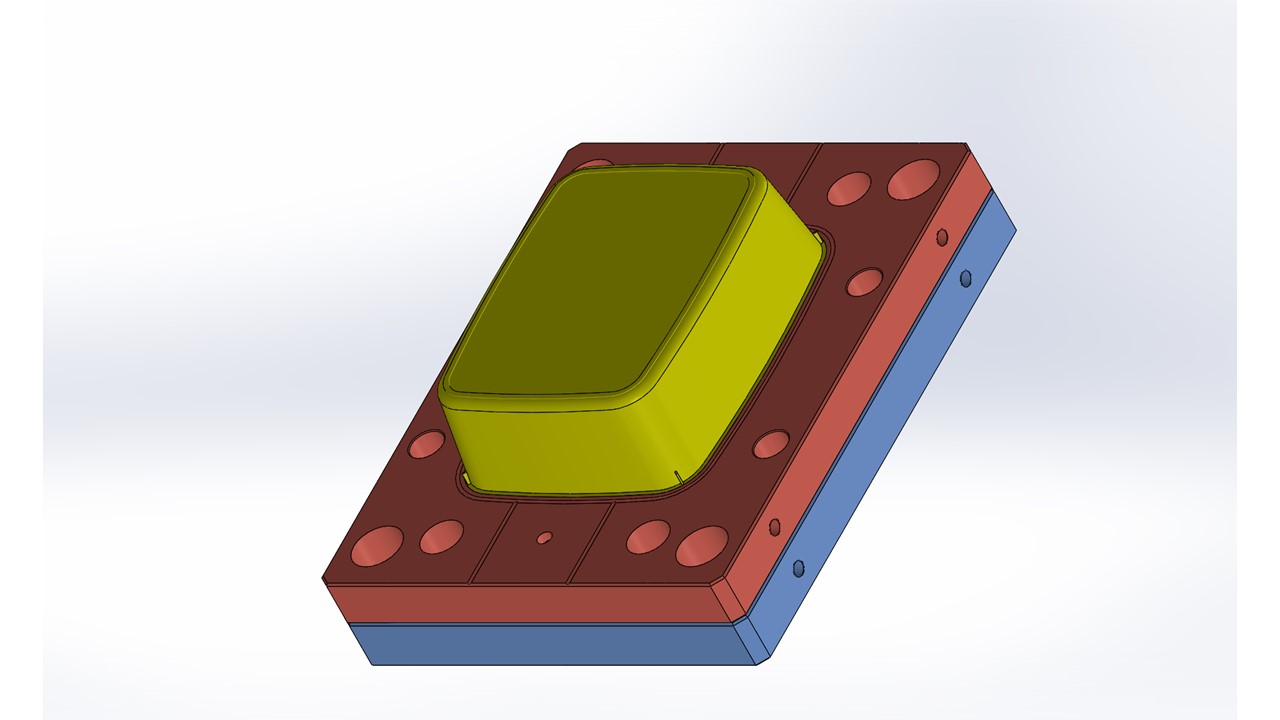
 Stripper Plate for 6 Litre Tub Mould
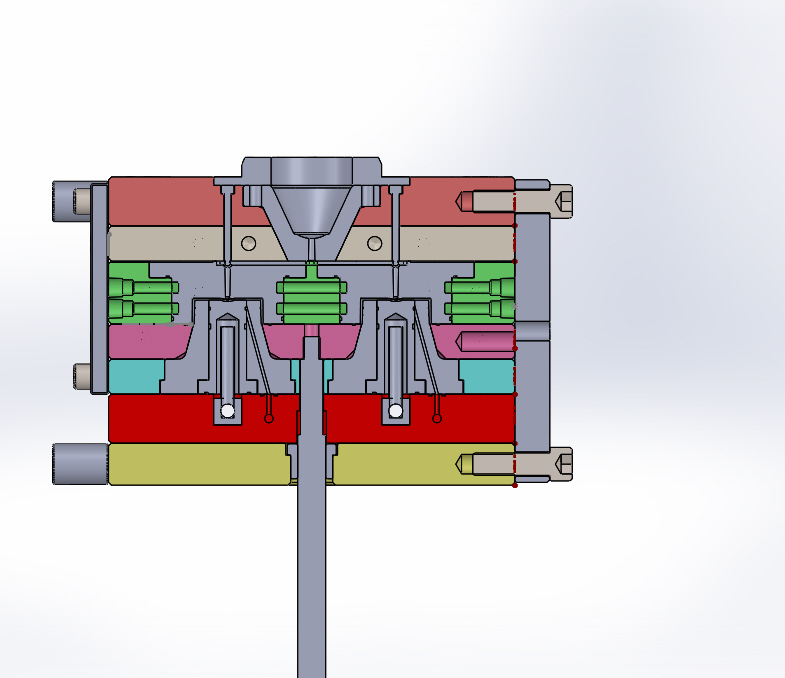
Click here to purchase the stripper CAD data for the 6 Litre Tub Mould for just $US2.50 Core & tub part CAD data also included.STEP format> (see Image below for preview)
The Cad data also includes venting design which is critical in moulding quality parts
 CAD Data Image for 6 litre stripper assembly
How To Make A Stripper Plate.
It can be made from a number of different types of tool steels - H13, P20, D2 and stainless steels can all be used. The choice depends upon cycle time, annual production quantity requirement and the type of plastic material to be moulded. For example, a stripper plate made from P20 pre-hardened tool steel is capable of achieving well over 1 million cycles before reconditioning is required to correct any quality issues. Thru hardened steels such as H13 are capable of achieving tens of millions of cycles.
A stripper plate can be made with standard machine tools but care must be taken by the machinist to work with close tolerances of 0.02mm (0.001 inch).
It is easier to make a stripper plate for a round part than for a square part. A round part needs a round stripper ring so a cylindrical grinder can be used. It is easier to hold tight tolerances with a grinder than with a milling machine which is required for square parts.
Making stripper plates for square parts usually requires some final fitting to the core by a hand grinding process called bedding. The bedding process will ensure the exact fitting tolerances required so that quality parts are produced for the life of the mould.
Right click here to download an example of a mold design with a stripper ring in PDF format.You will need Adobe Reader (the latest version is recommended) installed on your computer in order to open and read this e-book. You can download Adobe Reader here (a new window will open so you can download it without leaving this page).
If you want to open the file in your browser window, just click on the link (not all browsers have this feature). However, if you want to download the file to view later, then right-click on the link and choose "Save Target As" or "Save File As." Then select where you want to save the file on your hard drive.
Once you have saved the file, locate where you saved it, and double click to open it.
In order to print, open the downloaded file, and select the "Print" option from the e-book menu.
How To Move.
There are 4 ways:
- with the machines mechanical ejector
- with hydraulic pistons within the mould
- with pnuematic (air) pistons within the mould
- with pull bars
Using a moulding machines mechanical ejectors is one of the most common ways of moving a stripper plate. It is cheap and easy to make and is very reliable. The machine ejectors can connect directly to the stripper plate or to a subset of ejector plates within the injection mold if they do not conveniently align with the mould stripper plate.
The disadvantage of this method is that it can only be used in a limited number of molding machines because machine ejector hole positions are different in different machines. However, this will not be a problem if this fact is taken into consideration during the mold design stage.
Hydraulic pistons within the mold is another common method. This method is used when the moulding machine ejectors are not in correct position to easily connect to the stripper plate. Some moulds are large and require large distances between the machine ejectors so the stripper plate moves smoothly during every cycle and doesn’t jam or get stuck. During the design stage, hydraulic pistons are placed close to the 4 corners of the mould so that proper ejection is achieved.
The 2 disadvantages of using hydraulic pistons is that they can leak oil and contaminate the parts and the machine must have a core pulling system which is used to control the hydraulic pistons.
Pneumatic pistons within a mould is just as easy to make as hydraulic pistons the only difference is the seal used on the piston. One is for pneumatic and the other is designed to be used with hydraulics although it is possible to get a seal to be used with both designs.
The advantage of using pneumatics is that any air leak will not contaminate the parts but there is less flexibility on pressure and speed control compared with hydraulics.
The use of pull bars is another cheap and easy way to move a stripper plate but the disadvantage is that they normally limit access to the mould in the machine so when a part gets stuck it is difficult to remove it by hand. Also, a die setter must take care in setting the mold opening stroke or the pull bars will break if the mould is opened past its limit. This is an expensive and time consuming repair.
The Disadvantages Of A Stripper Plate.
Making a mould with a stripper plate is a lot more difficult than making a mould with ejector pins. If it is not designed and made right there will be constant part quality issues such as flashing. Cycle time will also suffer.
Moulds with stripper plates require more mould maintenance than moulds without. There is always a waxy residue which builds up over time behind a stripper plate and this must be cleaned on a regular basis – usually every 48 hours of production. If cleaning is not done part quality issues will result sooner rather than later.
Additional Comments
Although an injection mold made with a stripper plate will cost more than a mold made with ejector pins, the productivity improvement is significant. As an example, a 20 litre container mould with ejector pin ejection had a cycle time of 45 seconds. When it was converted to stripper ring ejection the cycle time reduced to 35 seconds. That is a 22% increase in productivity.
If you have a question about stripper plates then make contact on the form below:
Return from Stripper Plate In Injection Molding to Plastic Injection Mold Design.
Return from Stripper Plate In Injection Molding to Home Page


